Creating a Payment Schedule
Open the Search window
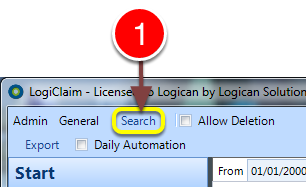
1: Click Search from the Menu – the Search window will open.
Open a Client
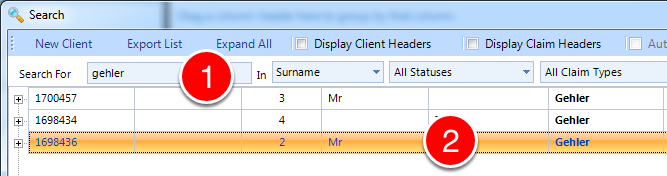
1: Enter search criteria, if required.
2: Double click the required client – the Client window will open.
Enter the Offer and Billing information
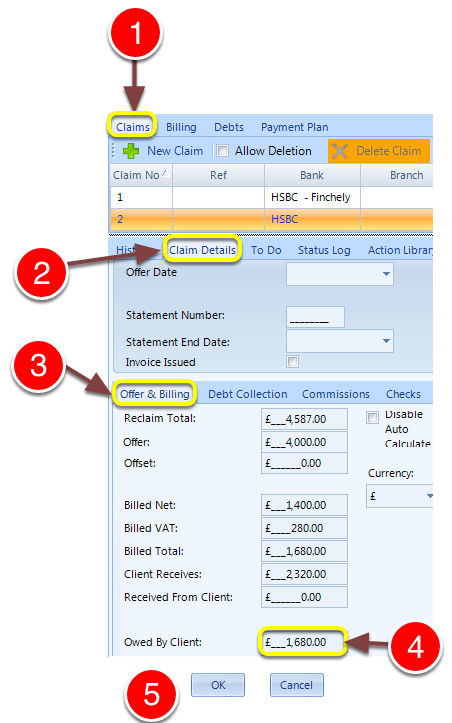
1: Click the Claims tab – the Claim window will open.
2: Click Claim Details – the claim Details window will open.
3: Click the Offer and Billing tab – the Offer and Billing tab will open.
4: Fill in the amount owed by the Client.
5: Click OK to Save and close the Client window – re-open the Client window as in step 1 and 2.
Open the Payment Schedule Details window
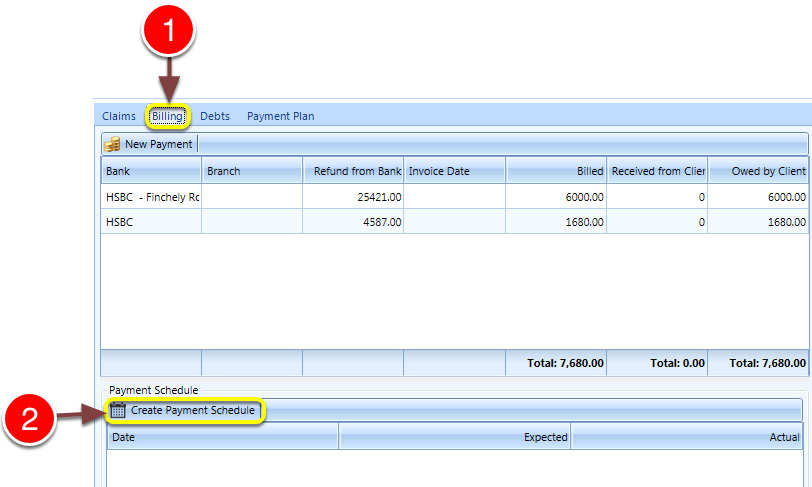
1: Click the Billing tab – the Billing window will open.
2: Click Create Payment Schedule – the Payment Schedule Details window will open.
Create a payment schedule
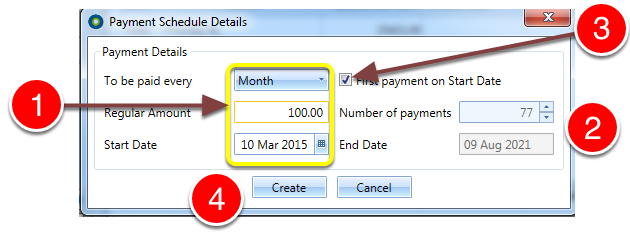
1: Enter the amount, frequency and start of the Payment Schedule.
2: These fields will change automatically as you toggle the schedule.
3: Tick this check-box if the payments are due at the beginning of a period.
4: Click Create to create the Payment schedule – the Payment Schedule Details window will close.
Save and close
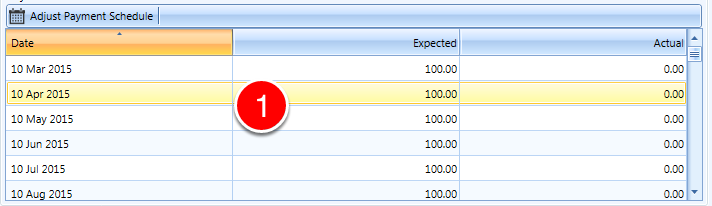
1: The Schedule is shown in the Billing tab, missed payments are shown red and outstanding payments are black.
Set reminders for the Scheduled Payments
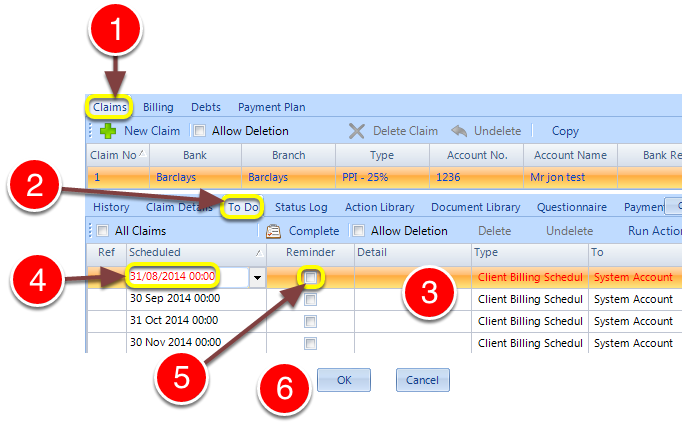
1: Click the Claims tab – the Claims window will open.
2: Click the To Do tab – the To Do window will open.
3: To Do items have automatically been added to the To Do list for each Scheduled Payment.
4: If required click on the date field to edit the reminder date and time.
5: Click on the tickbox to turn on the reminder for the scheduled payment.
6: Click OK to save and close the Client window.