How to set-up an Action to print Documents
Open the Action Library
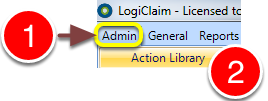
1: Click Admin in the menu.
2: Select Action Library from the drop-down list – the Action Library will open.
Select the required Action
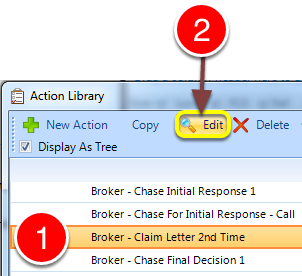
1: Select the required Action.
2: Click Edit – the Action’s window will open.
OR Create a new Action.
Add documents
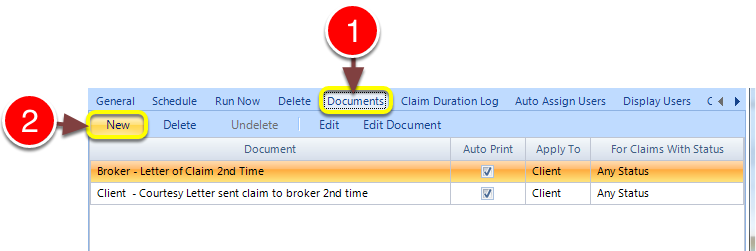
1: Click the Documents tab – the Document list will open.
2: Click New – the Document to Run window will pop up.
Choose the document, which claim to apply it to and under what circumstances
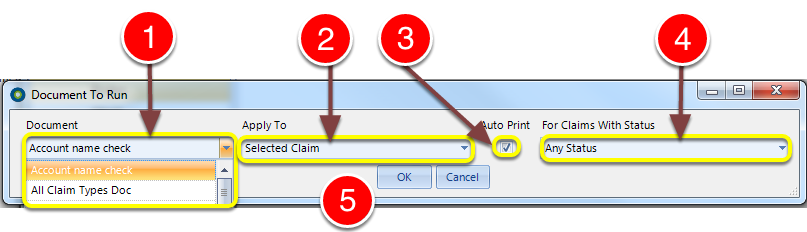
1: Select the required Document from the drop-down list.
2: Select for which Claim the Document should run. See below for available options.
3: Tick to Auto-Print the Document.
4: Select whether this Document should run for all Statuses or whether it should be status specific.
5: Click OK to Save and close the window.
Available options
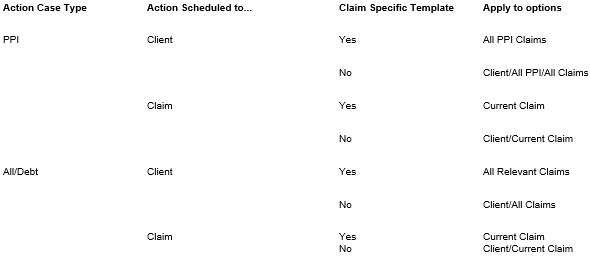
When a template is applied to the Client, there is no option to run it dependent on a Claim Status