How to create a new User
Open the Users window
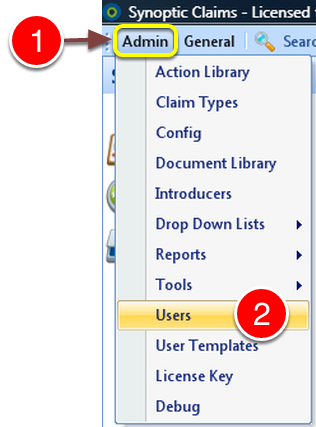
1: Click Admin from the Menu.
2: Click Users from the drop down list – the Users window will open.
Add a User
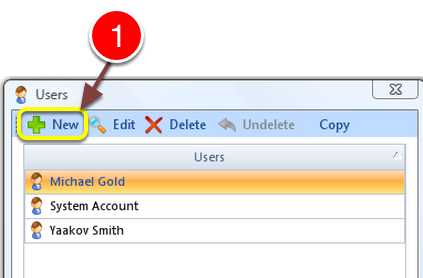
1: Click New on the Menu – the New User window will open.
Edit the User details
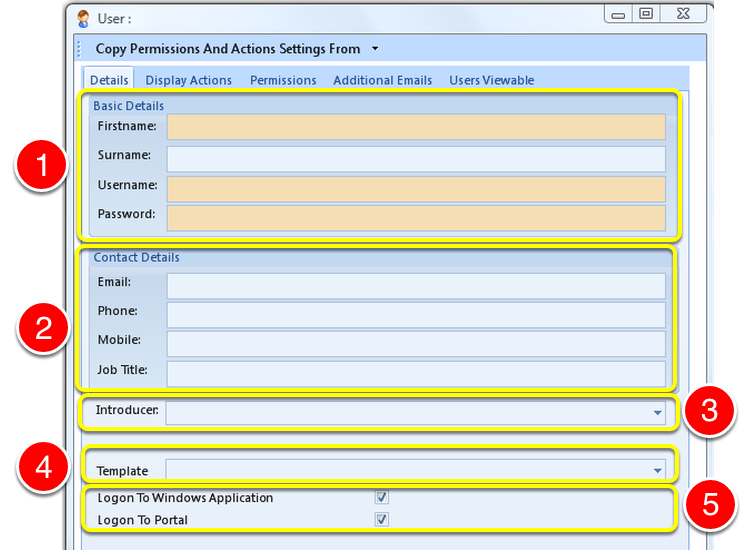
1: Complete the Basic Details – highlighted fields are mandatory.
2: If required key in Contact details.
3: If required select an Introducer from the drop down list. Click here to see how to add a new Introducer to the list.
4: If required Select a Template from the drop down list. Click here to see how to add a new Template to the list.
5: Select if this user can log into the Windows Application and/or the Web Portal.
NOTE
The Windows Application is the software that is installed on your computer or server.
The Web Portal is a version of the software found online but does not have 100% of the features available.
Set up Users Permissions
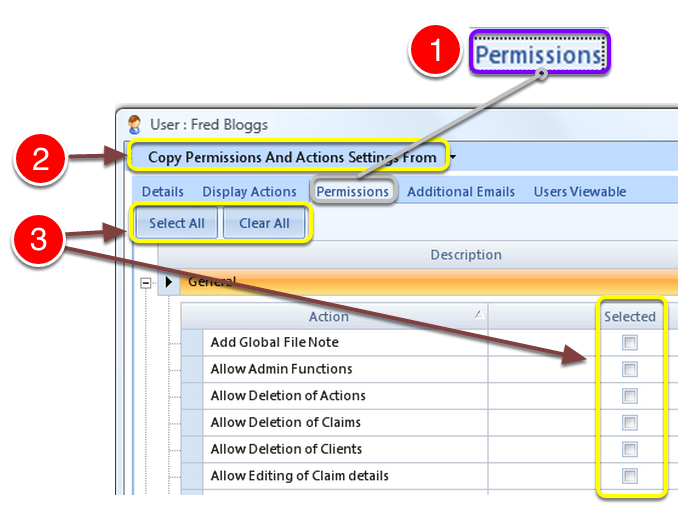
User Permissions authorise or block users from performing tasks or viewing information.
1: Select the Permissions tab – the User Permissions window will open.
2: It is best to start with copying the Permissions from a user that does a similar job first. Click here to see how to do this.
3: You have 2 options. You can authorise this user to do everything by clicking the Select All button (Not recommended), or tick the check boxes to authorise or de-authorise individual actions.
Control the display of action types
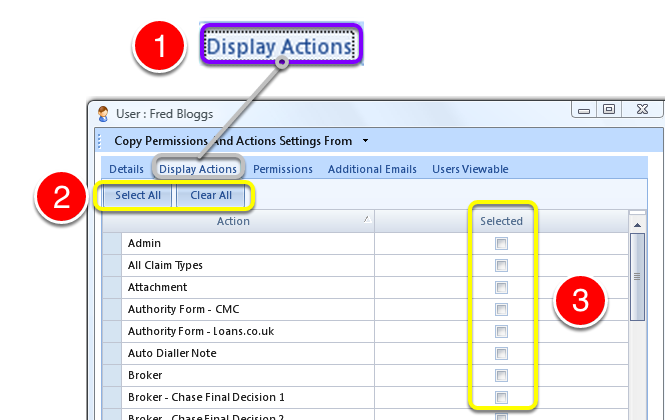
A Display Action sets what the User can or cannot see on the system.
1: Click Display Actions tab – the Display Actions window will open.
2: If required you can start by authorising the User to see all Action Types by clicking the Select All button.
3: Change the Actions this user can see by clicking the check boxes to turn the ticks on or off to authorise or de-authorise the User.
Close the window
1: Click OK to save the changes and close the window.