How to add/change custom action Claim Button in Client window – for a specific claim type
Open the Required Claim Type
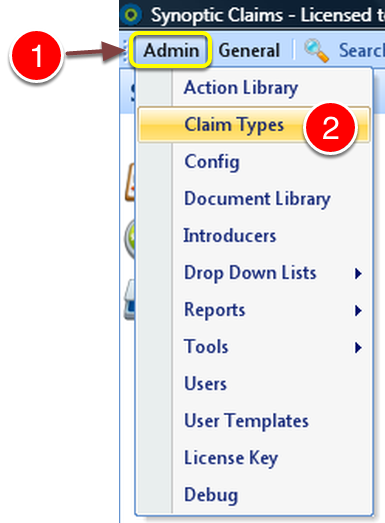
1: Click Admin from the menu.
2: Click Claim Types from the Drop Down Menu – The Claim Types window will open.
Open Edit Claim Type Window
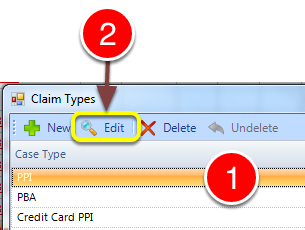
1: Click the Claim type required.
2: Click Edit – the Edit Claim Type window will open.
Select Button to Edit
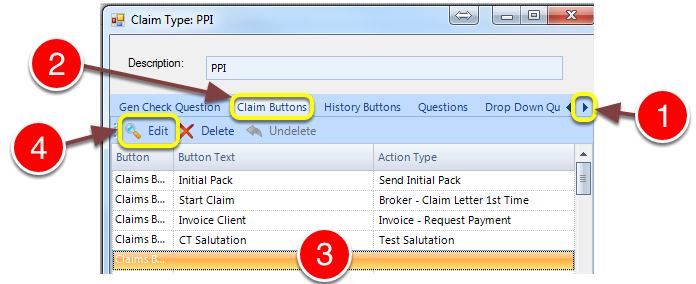
1: Click the arrow key to scroll through the menu bar functions until the Claim Buttons button is visible.
2: Click the Claim Buttons tab – the Claim Buttons edit window will open.
3: Click on the next available button.
4: Click Edit – The Claim Buttons Details window will open.
Edit Button Details
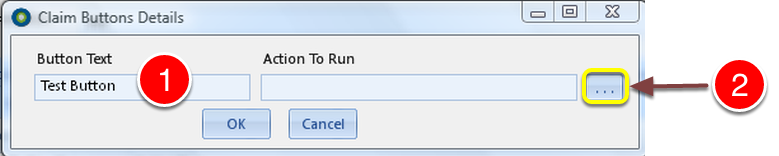
1: Type the required button name in the Button Text.
2: Click … button to open the button actions window.
Select a Button Action
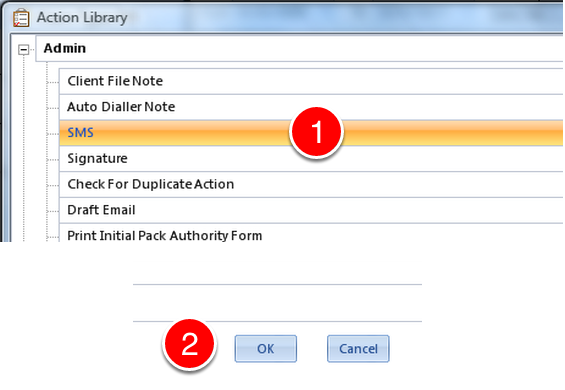
1: Select a button action from the list.
2: Click OK – the window will close.
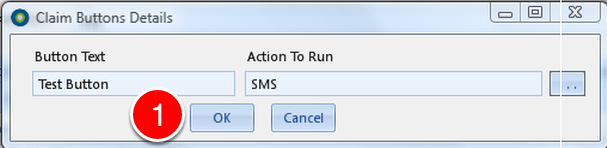
1: Click OK – the Claim Button Details window will close.
Button Has Been Added
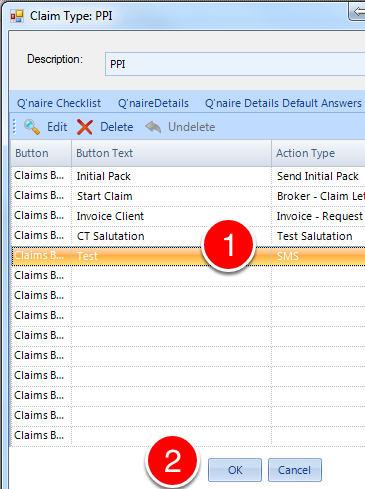
1: In this example the button has been added to location 5.
2: Click OK to save and close the window.
EACH USER WILL NEED TO BE AUTHORISED TO USE THE NEW BUTTON – Click here to see how.

Once the user is authorised – The test button will show for all relevant claims.