How to use the Claims ‘LT ‘ (list) merge fields
Info
The purpose of these merge fields is to enter multiple results of a particular piece of information into a document. For example, listing all the clients claims, statuses, banks etc.
Ensure the Settings are correct
Open the Config
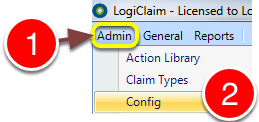
1: Click Admin from the menu.
2: Select Config from the drop-down menu – the Config will open.
Check the setting
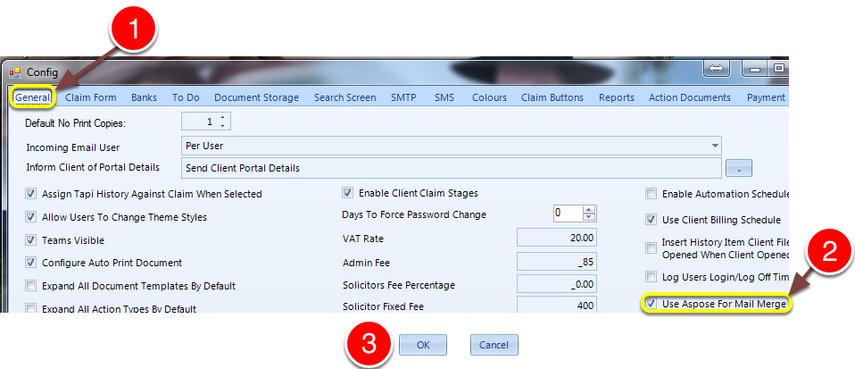
1: Click the General tab – the General window will open.
2: Tick the Use Aspose For Mail Merge check-box.
3: Click OK to save and close the Config.
Open the Document Library
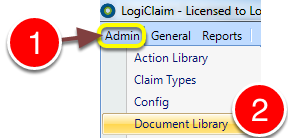
1: Click Admin from the menu.
2: Select Document Library – the Document Library will open.
Open/create the document
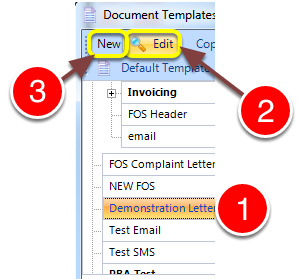
1: Select the required document.
2: Click Edit – the Template edit window will open.
OR
3: Click New – the Template edit window will open.
Open the document in word

1: Click Edit body of Document – Microsoft word will open.
Select the required LT merge fields
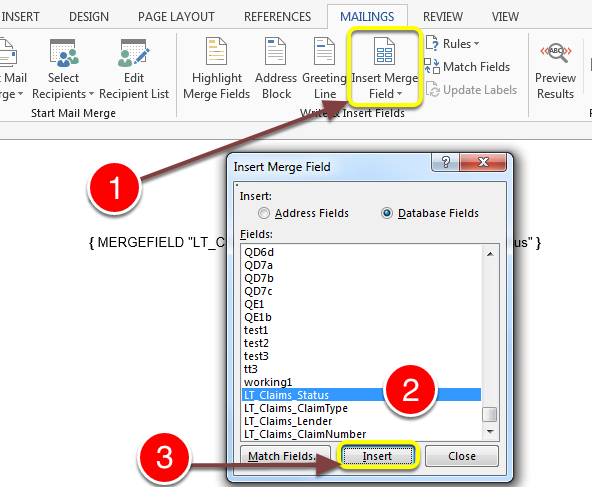
1: Place the cursor in the required location in the page and click Insert Merge Fields – the insert merge fields window opens.
2: Select the required LT_Claims_ merge fields.
3: Click Insert.
Add Start and end commands
Insert any none-LT merge field
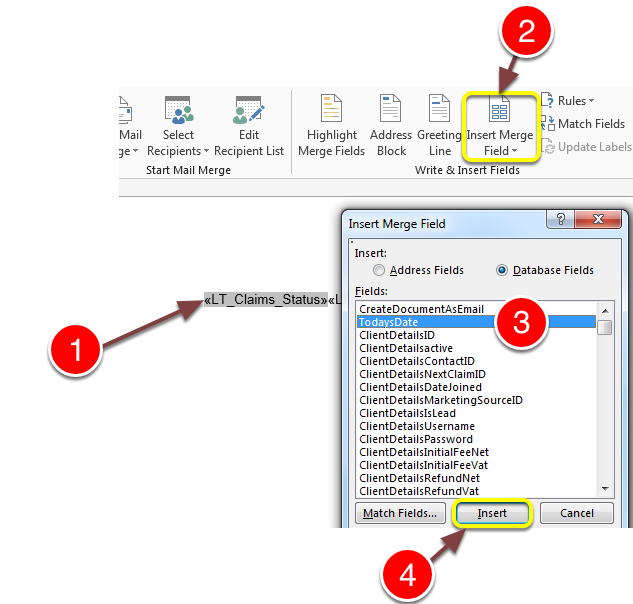
1: Place the cursor before your first merge field.
2: Click Insert Merge Fields – the insert merge fields window opens.
3: Select any non- LT_ merge field.
4: Click Insert.
Then place the cursor after the last merge field and repeat the above
Change it to a start and end command
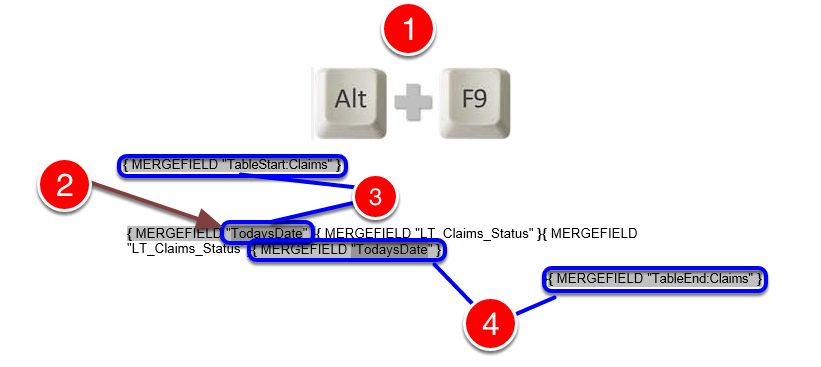
1: Press Alt f9 – the merge mode will start.
2: Highlight the quotation marks and it’s contents in the first merge field.
3: Type TableStart:Claims
4: Repeat the above in the last merge field, overwriting with TableEnd:Claims.
Save and exit Word.
The finished document
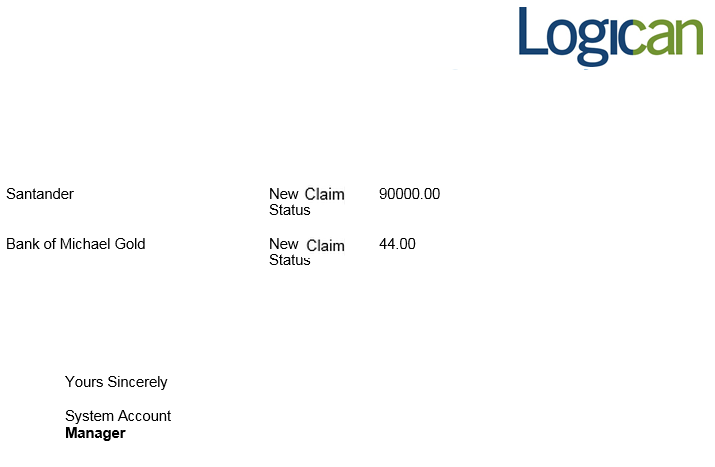
When the document is run, a list of all the claims is created containing the selected merge fields information.