How to Add, Edit or Delete a Schedule to an Action
Open the Action Library
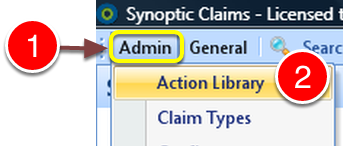
1: Click Admin from the menu.
2: Select Action Library from the drop down list – the Action Library will open.
Select Action
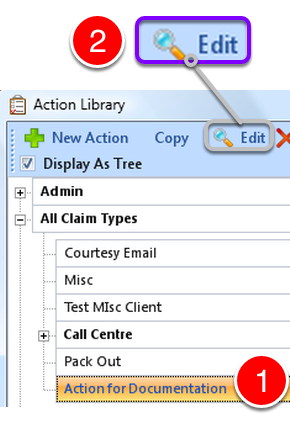
1: Select the action to edit.
2: Click Edit from the menu – the Edit Action window will open.
Create a New Schedule
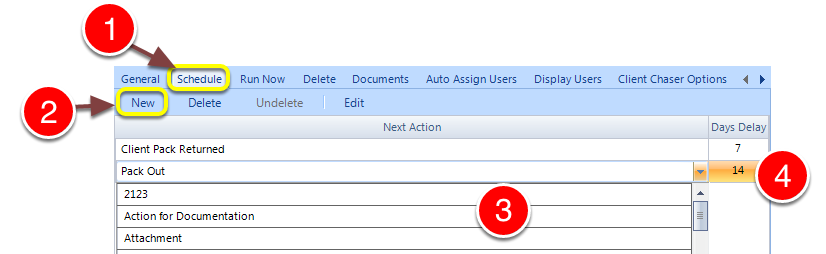
1: Click the Schedule tab – the Schedule window will open.
2: Click New from the menu – a new schedule will be created ready for edit.
3: Select the action you wish to be scheduled from the drop down list.
4: Click and enter the amount of days to delay before running the action.
Delete an Action
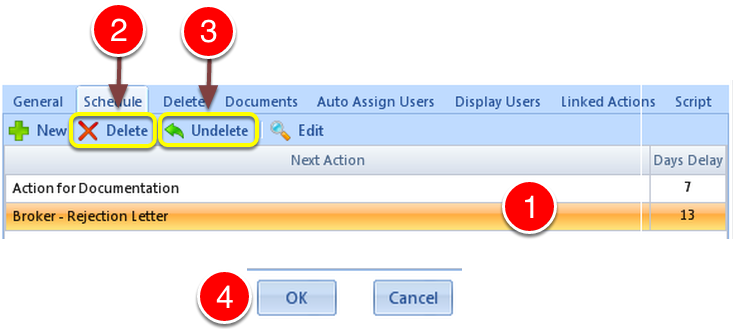
1: Select the schedule to be deleted.
2: Click the Delete button to delete – the scheduled item will be deleted.
3: If deleted in error, click Undelete to abort the deletion.
4: Click OK to close the window.