How to Set Up an Action
Open the Action Library
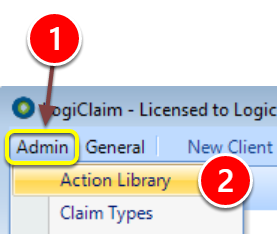
1: Click Admin from the menu.
2: Select Action Library from the drop down list – the Action Library window will open.
Create a New Action
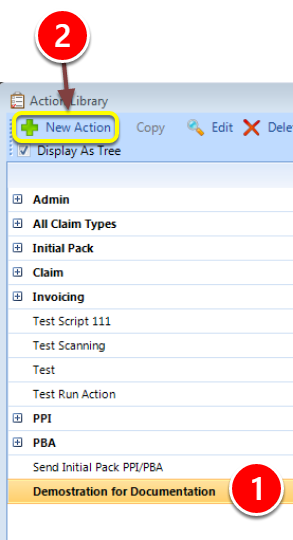
1: Select the group to put the action into.
2: Click New Action – the New Action window will open.
General Details
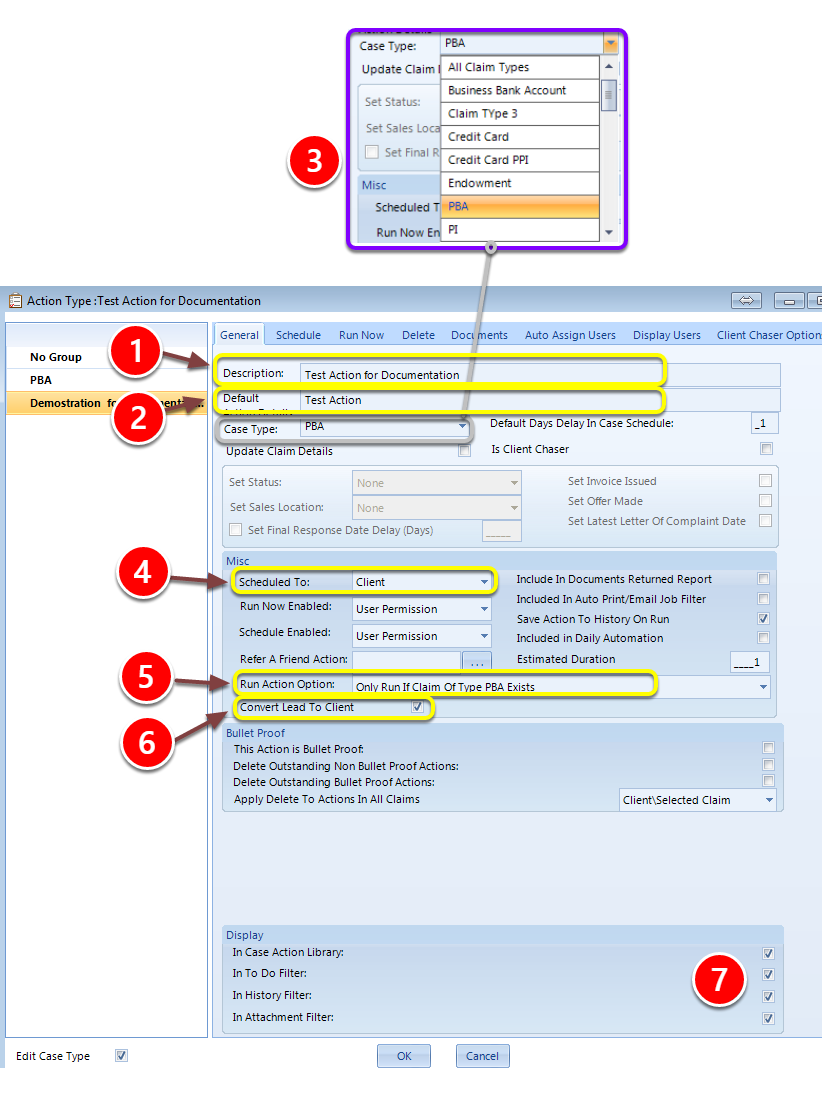
1: Enter a Description for the action.
2: If required, type some text for the Default Action Details (This appears in the History).
3: Select the Case Type from the drop down list. (If a Case Type is selected, the action will only appear for the relevant Case Type).
4: Schedule to Client or Claim. (Scheduling to a Client will allow the Action to be run on all Claims at the same time.
— Scheduling to a Claim will require the Claim to be selected before the Action is run).
5: Select the Run Action option. (Selecting Always Run will run the action on all claims; no matter what type of claim they are.
— Selecting Only Run if … Exists will only run the Action on matching Claim Types).
6: Tick the Convert Lead To Client checkbox if you wish to convert any leads to live clients on the run of this action.
7: Select where the action should be displayed.
Schedule Further Actions
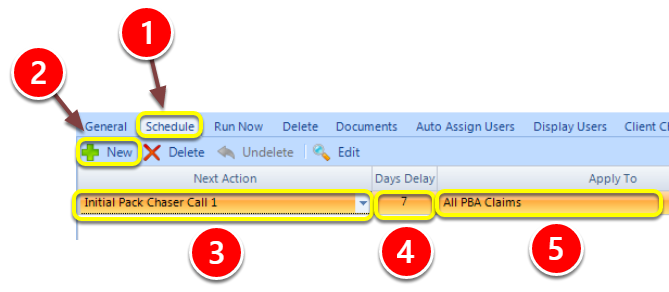
1: Select the Schedule tab – the Schedule window will open.
2: Click the New button – A new line will be created ready for editing.
3: Select the Next Action from the drop down list. The list will only show the actions that are of the correct claim type or all claim types.
4: Select the number of days to delay this action. The date will be calculated and the action will appear in the To Do list.
5: Select which type of claim this action should be scheduled to.
Add Run Now Items
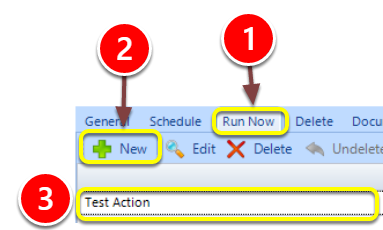
1: Click the Run Now tab if other Actions should be run now at the same time.
2: Click New to add the actions – a new line will be created for editing.
3: Select the required action from the drop down list.
Add Documents
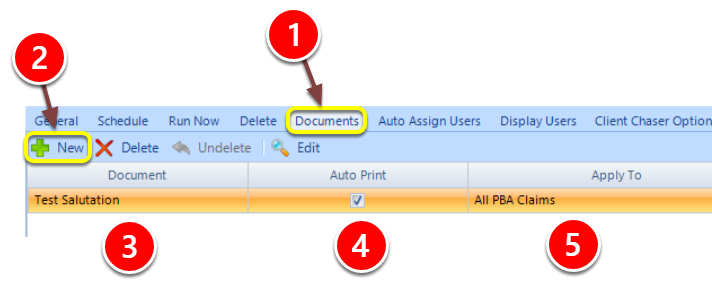
1: Click the Documents tab – the Documents window will open.
2: Click the New button – a new line will be created ready for editing.
3: Select the required document from the drop down list. Only documents of the correct claim type or all claim types will be displayed.
4: If the document should go directly to the printer, tick the Auto Print checkbox. Alternatively the document will open in Microsoft Word.
5: Select the Claim Type that you wish this document to run for.
Auto Assign Users
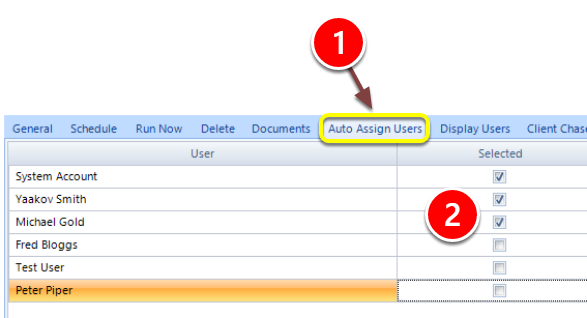
1: Click the Auto Assign Users tab – the Auto Assign window will open.
2: Select the Users that you wish to be able to run this Action. If a User is not selected, they will not be able to see this action.
— However, if this action is linked to another action in the Run Now, the user does not need to see it for it to run.
Display Users
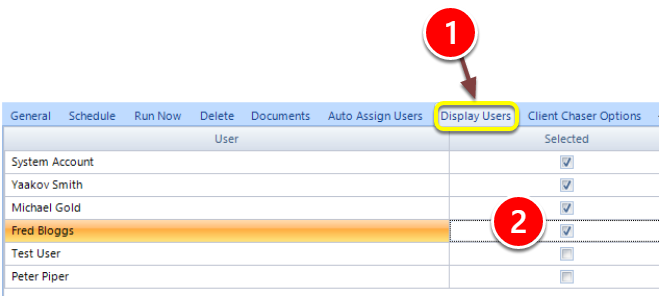
1: Click the Display Users tab – the Display Users window will open.
2: Tick the user or users that you wish the To Do actions to be assigned to.
— Selecting more than one user will result in the To Do actions being distributed evenly between the selected users.
Close the Window
1: Click OK to save the data and close the window.