How to Set Up an Action to Only Run Other Actions
Info
NOTE: When a child action is linked to the Schedule or Run Action, the assigned user is determied by the child.
Open the Action Library
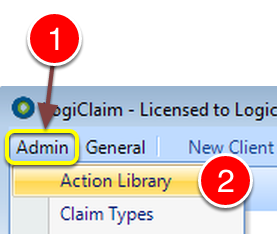
1: Select Admin from the menu.
2: Select Action Library from the drop down list – the Action Library window will open.
Create a New Action
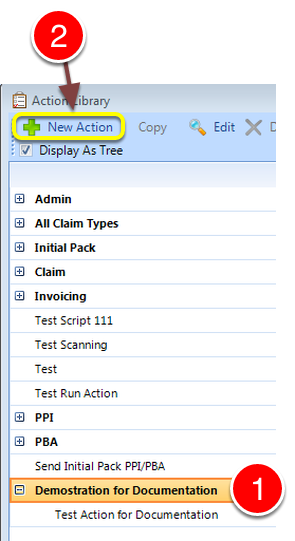
1: Select a group to add the action to.
2: Click New Action – the New Action window will open.
Fill in the General Details
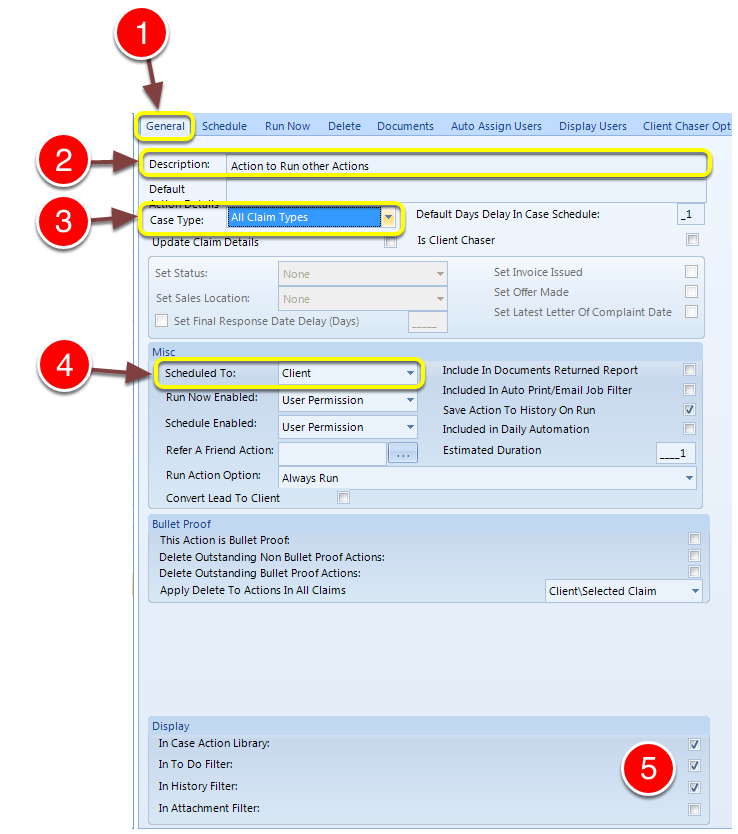
1: Select the General tab – the General window will open.
2: Add a description for the action.
3: Select All Claim Type from the drop down list.
4: Schedule to the client or the claim depending on requirement.
5: Choose where the Action should display and tick the relevant checkboxes.
Add the Actions to Run
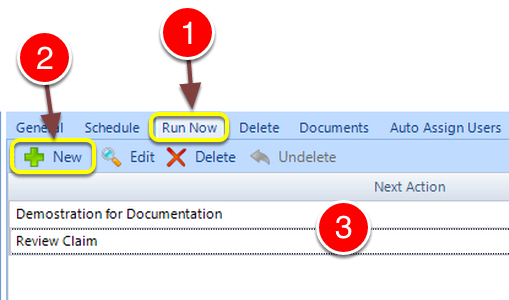
1: Select the Run Now tab – the Run Now window will open.
2: Click the New button – a new entry will be created for editing.
3: Select the actions from the drop down list.
Select Which Users can See this Action
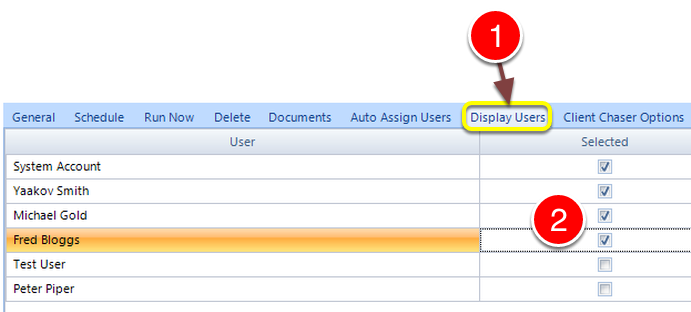
1: Select the Display Users tab – the Display Users window will open.
2: Select the users that should see the action by ticking the relevant tickboxes.
Close the Window
1: Click OK to save the data and close the window.