Setting Up (Administrators)
How well the screen works depends on the setup behind it. Most of it is on the LogiClaimX
Admin Portal:
| Set up | Why | Where |
|---|---|---|
| Correspondence categories | What each kind of letter is, its folder, its follow-up and the phrases that recognise it. Nothing is categorised without these. |
Corresp. |
| Lender settings | Lender email addresses (so emails are recognised) and agreement-number precedence. |
Third Parties |
| Linked lender groups | Lenders that act as one: shared phrases and duplicate-claim handling. | Linked Lender Groups |
| Quick actions | The one-click actions in the viewer toolbar. | Quick Actions |
| Credit report lender names | Puts imported claims on the right lender, so their post matches. | Lenders |
| Other prerequisites | Assignment pools, schedule rights, favourites, templates, the History filter, inboxes and scanning. |
LogiClaim desktop application / Logican |
Correspondence Categories
Categories decide what each lender letter is, which folder it lands in, and what
happens next. Open them from the Corresp. tile in the Admin Portal (page
Correspondence Parsing Configurations).
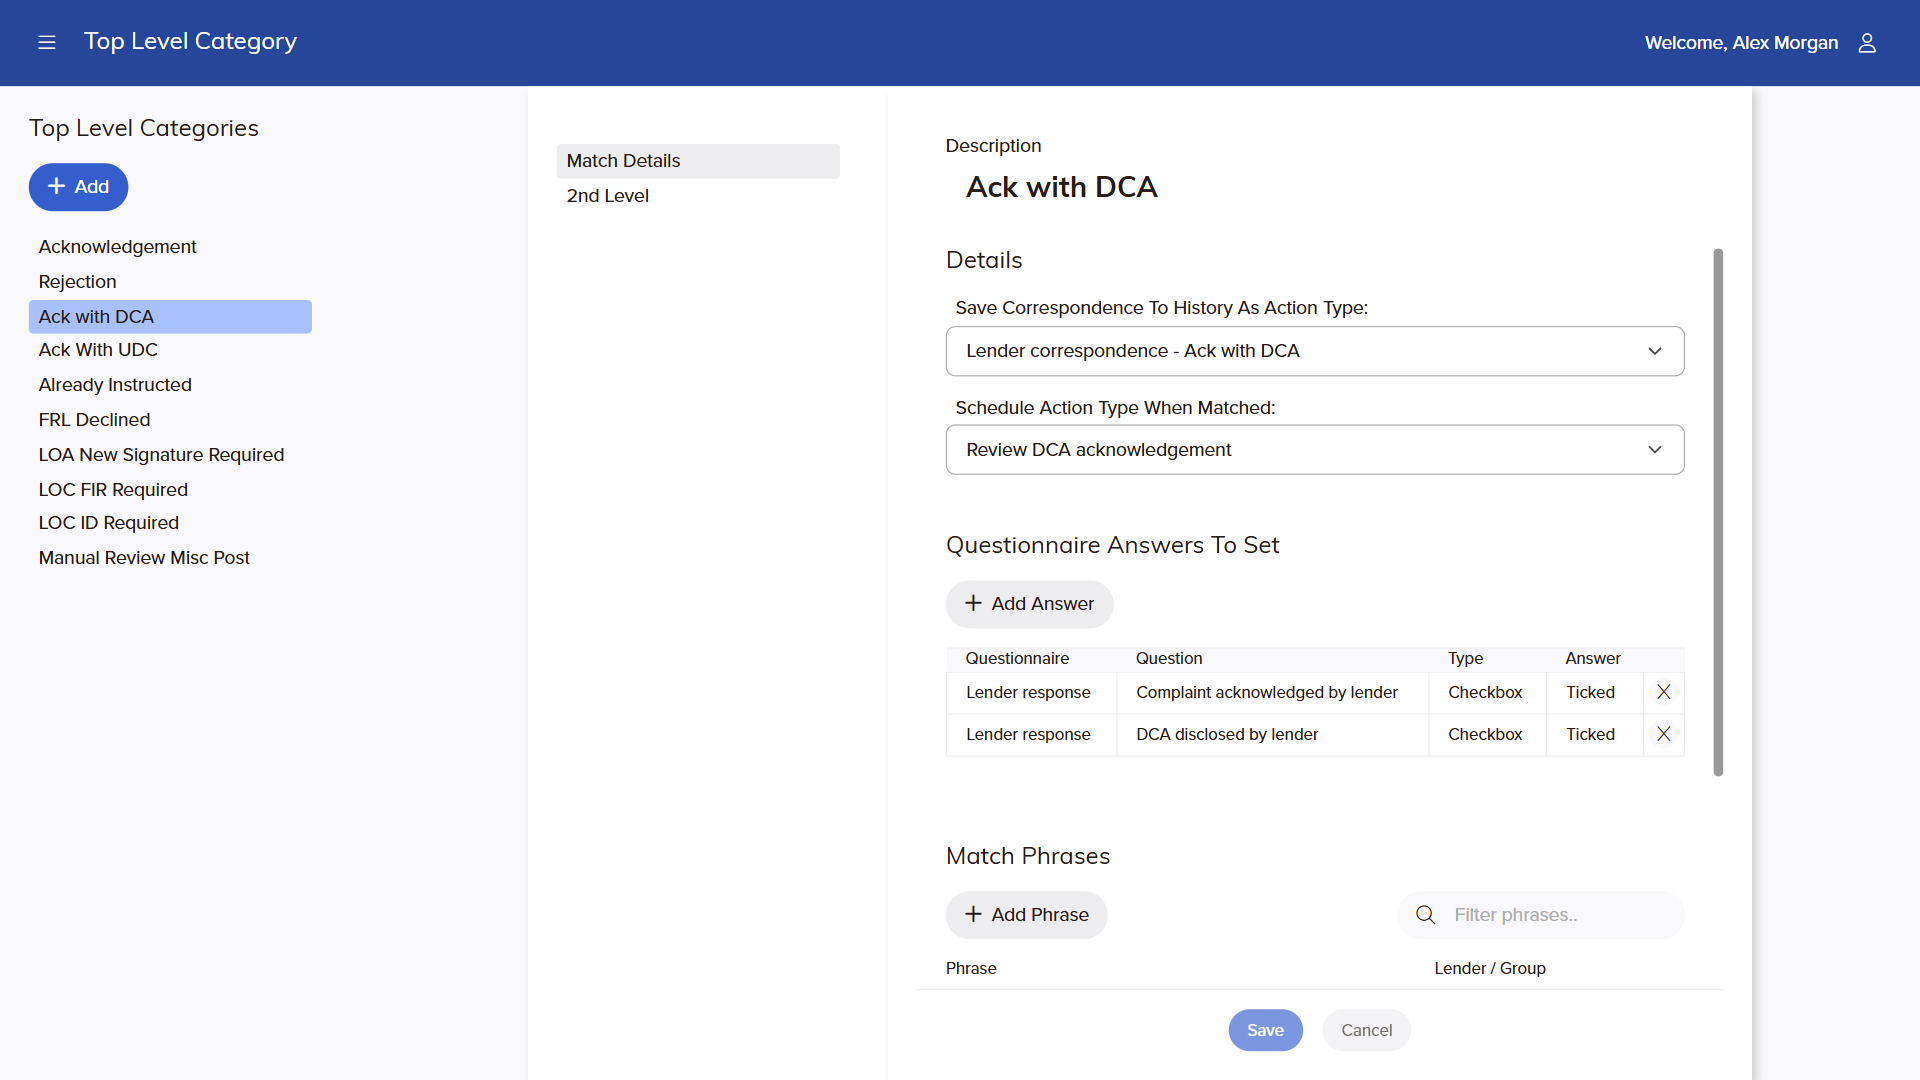
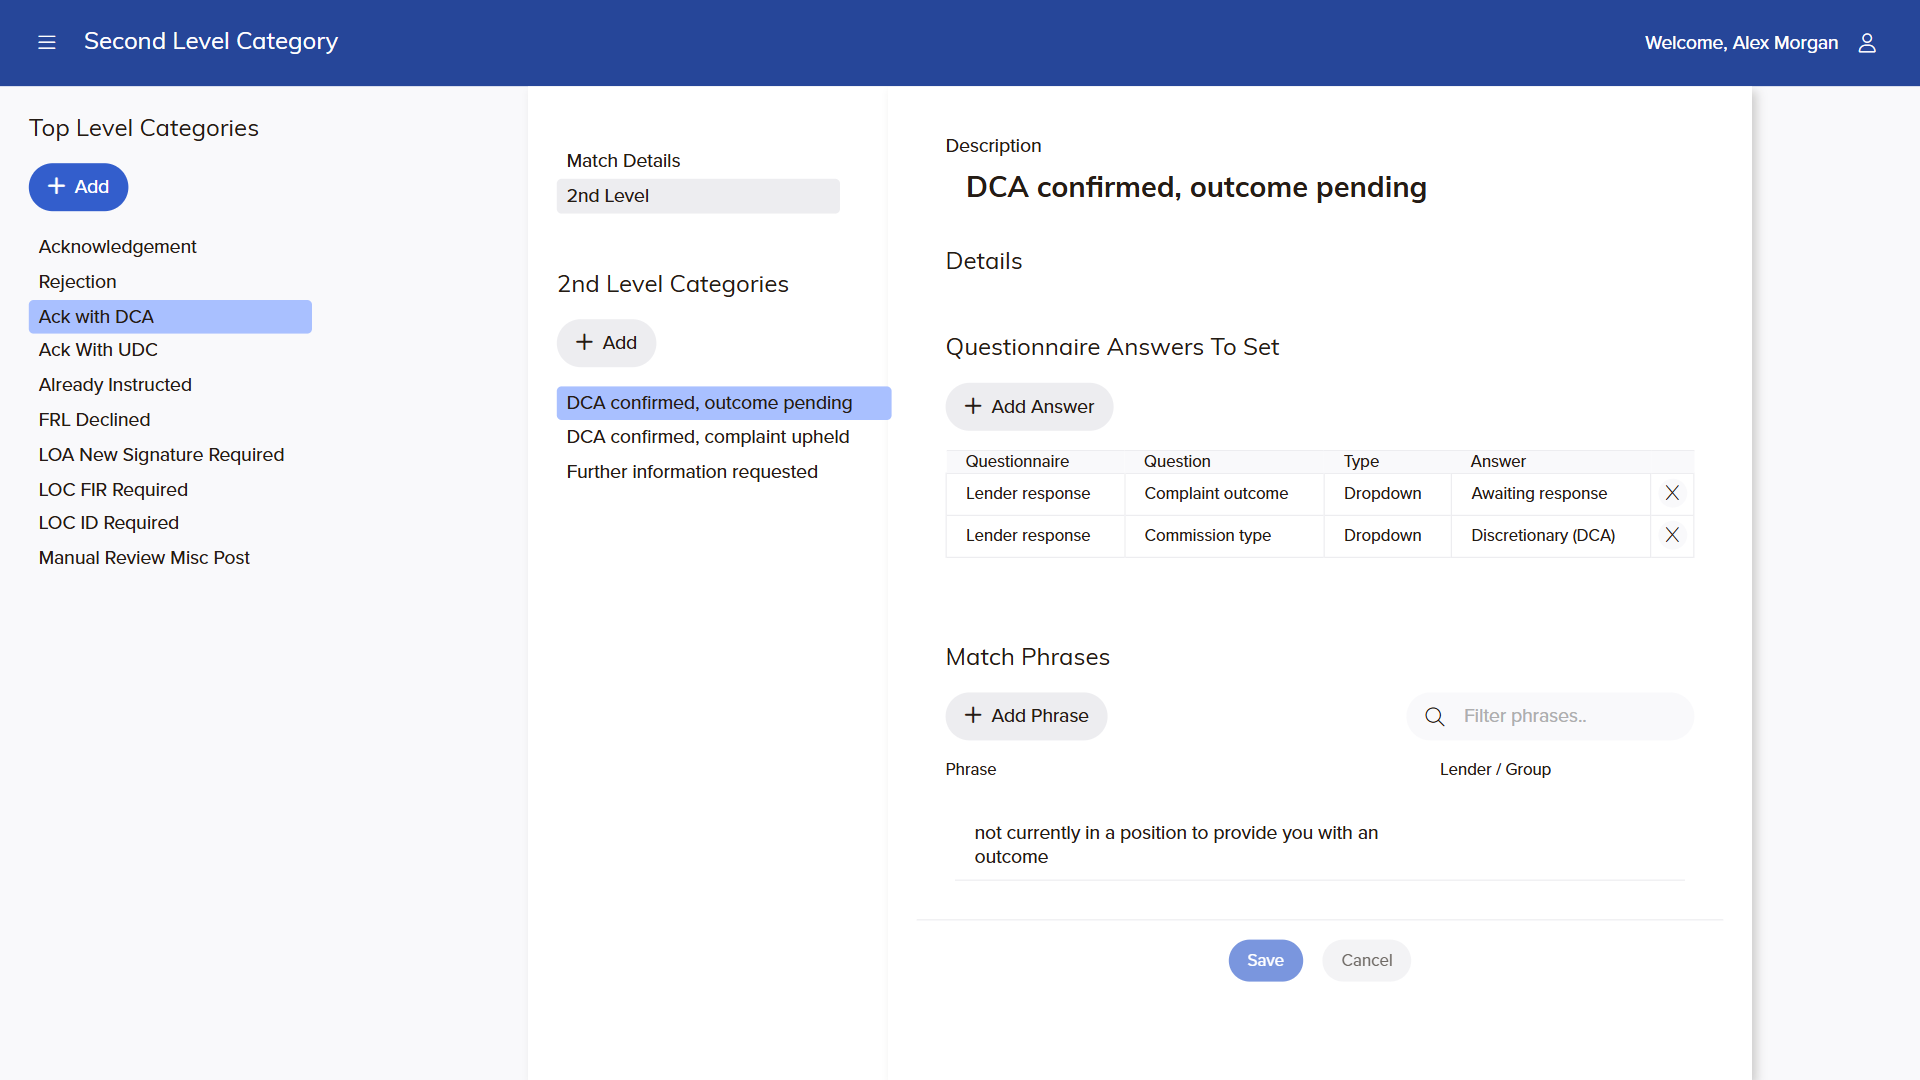
The Ack with DCA category: its two action types, the answers it sets and
(further down) its match phrases.
1. Add a top level category
Click Add under Top Level Categories and give it a
Description. This is the folder name agents see, so it must be unique. Then set:
| Field | What it does |
|---|---|
| Save Correspondence To History As Action Type | The history entry the item becomes once it is matched. Folder membership is worked out from this type, so give every category its own. |
| Schedule Action Type When Matched | The follow-up created when the category matches. While it is waiting the item sits in Pending Review; once it has run the item moves to Processed. If this action is automated and run by the LogiClaimX Action Runner, agents see the category as handled automatically; otherwise it is reviewed by hand. Each category needs a different follow-up type. |
Important
A category only appears in the agents’ folders and
Categorise menu when both action types are set.
2. Add match phrases
Phrases are the words that identify the category in a letter or email. Click
Add Phrase, type the phrase, and optionally scope it to one
Lender or one Lender Group (one or the other). Unscoped phrases apply to every
lender.
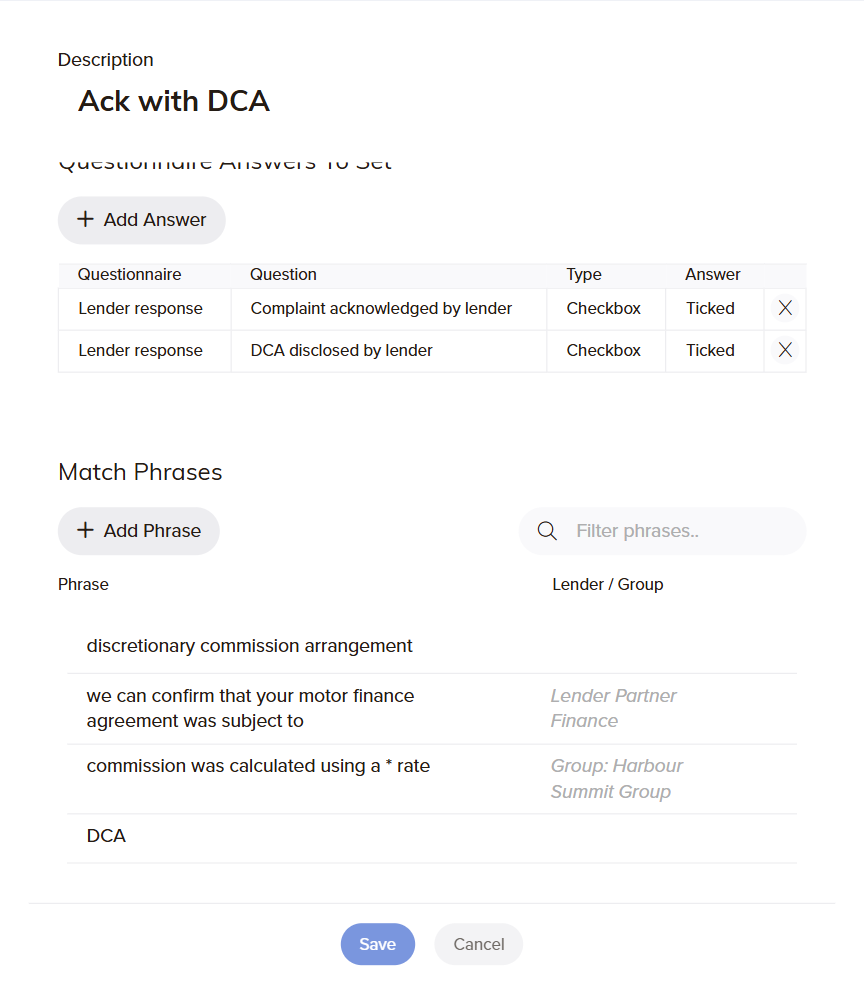
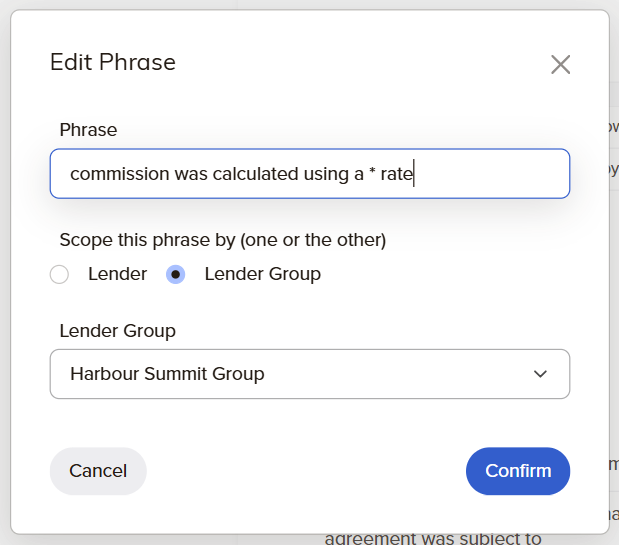
Phrases can apply to all lenders, one lender or a lender group. The
* wildcard stands for a short run of any text.
- Matching ignores capitals, apostrophes, quote styles and extra spaces.
*matches up to about 100 characters – best for short phrases such as a
rate or a name. Exact phrases are always tried first.- A phrase may not contain another phrase in the same or another category; the save is
refused if it does. - Phrase changes only take effect when you click the category’s Save.
3. Set questionnaire answers (optional)
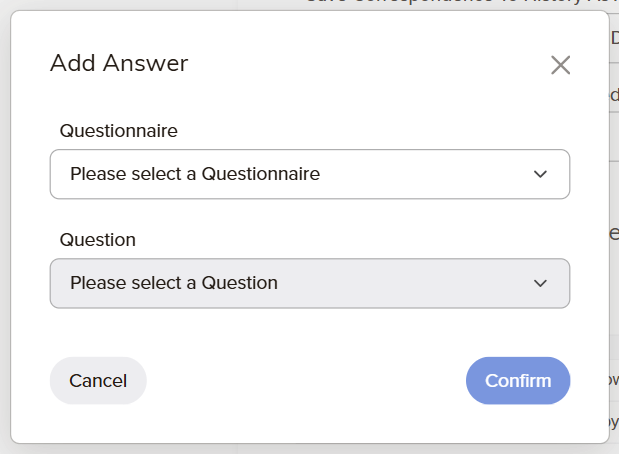
Questionnaire Answers To Set lists answers written to the claim whenever the
category is applied. Click Add Answer, choose the
Questionnaire, the Question (only checkbox and dropdown questions can be set)
and, for a dropdown, the Answer. Each question can be set once per category. These same
answers are offered to agents when they categorise by hand.
The questionnaires themselves are built in the LogiClaim desktop application.
4. Add second level categories (optional)
Second level categories pick out finer outcomes within a category – for example
DCA confirmed, outcome pending versus DCA confirmed, complaint upheld. Open the
2nd Level tab, click Add, and give each one a description, its own
match phrases and its own answers. Their answers are applied only when their phrases are found,
and override the top level answer to the same question.
Settings with no screen yet
Ask your Logican contact to set these if you need them: a phrase that should fail the
item if it appears twice (a sign the lender has combined several agreements in one letter),
regular expressions that capture a value such as an offer amount into a claim question, and a
second level category that updates an essential document.
Lender Settings
Two settings on each lender’s Third Parties record affect incoming correspondence.
Open the Third Parties tile and select the lender.
Email address – so the system recognises the lender
An incoming email is only read as lender correspondence if the sender’s address (or its
domain) belongs to a lender. Make sure each lender’s Email address is the address or
domain they write from. Matching works upwards only: mail from lender.example
does not match a contact held at uk.lender.example. Emails from unrecognised
senders arrive as plain items in Unlinked until someone links or reprocesses them.
Claim identifier precedence
Some lenders quote your reference and their agreement number in ways that can point at
different claims. For those lenders, set Claim identifier precedence to
Agreement number takes precedence, and the agreement number wins. Leave it at No
preference for everyone else.
The setting is read from the lender the email sender belongs to, or the lender chosen
when scanned post is uploaded – so choose a lender at upload time.
Linked Lender Groups
A linked lender group bundles lenders that act as one – for example two brands of the same
finance house. Open the Linked Lender Groups tile.
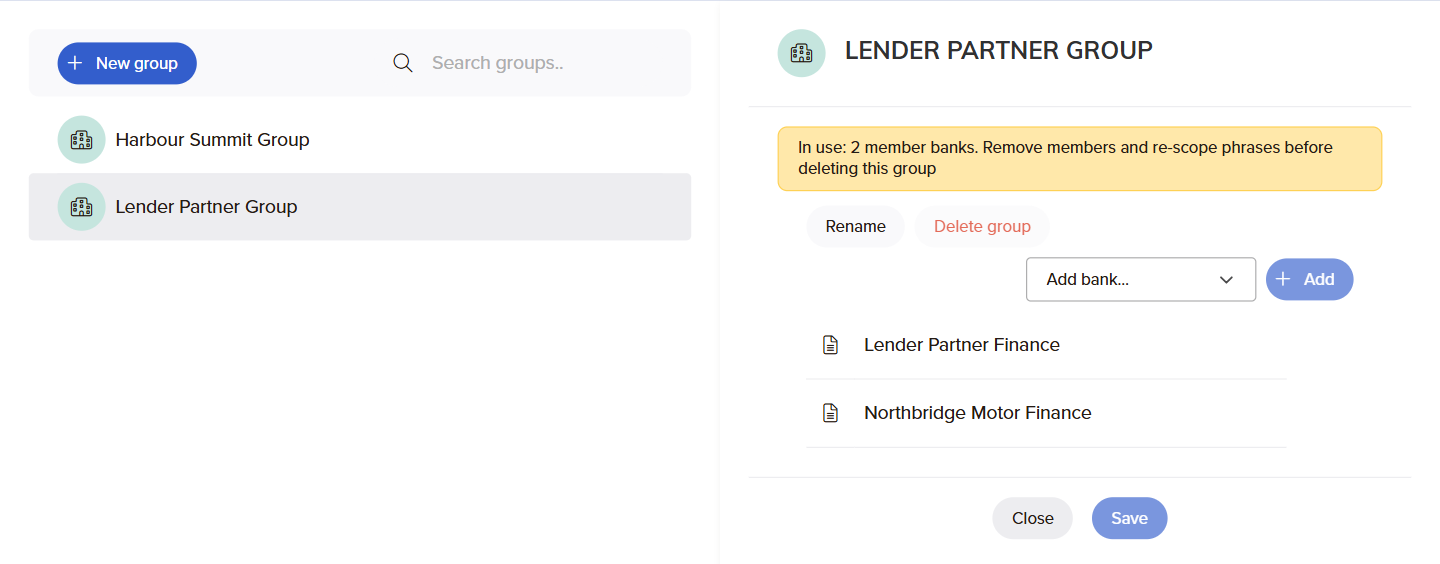
A group with two member lenders.
What groups do for correspondence
- Phrases – a match phrase scoped to a group applies to every lender in it, so you
write it once (see Correspondence categories). - Duplicate claims – claims at lenders in the same group count as possible
duplicates of each other, and correspondence is linked to the one claim in such a set that is
not marked as a duplicate.
Set up a group
- Click New group and enter the Group name.
- Pick a lender from Add bank… and click Add; repeat for each
member. - Click Save.
A lender can belong to only one group. A group that still has members or phrases cannot be
deleted – remove the members and re-scope its phrases first.
Quick Action Types
Quick actions are the lightning-button actions in the Incoming Correspondence toolbar. They
run straight away against the item’s client or claim, so agents can, for example, chase a
lender in one click. Open them from the Quick Actions tile.
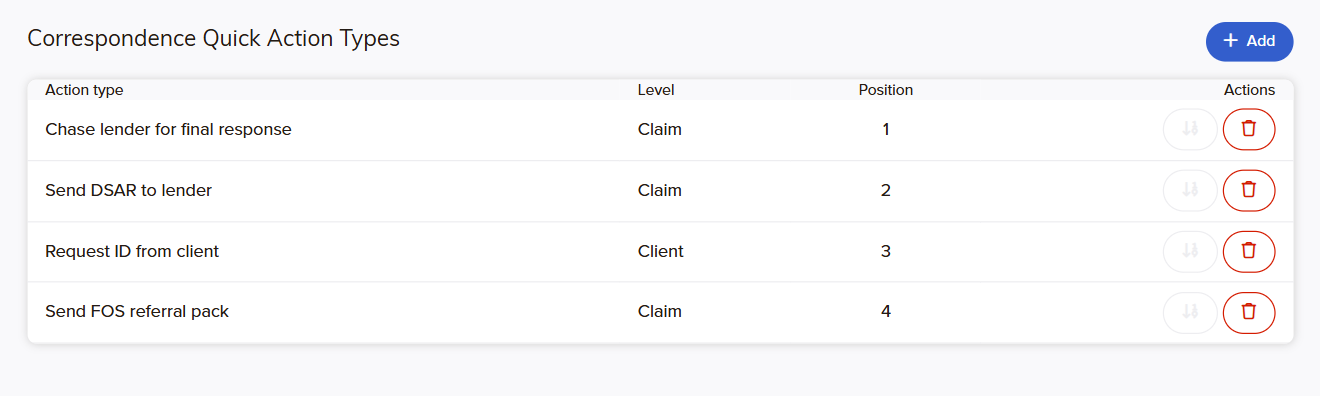
Each row shows the action, whether it works at client or claim level, and its
position in the menu.
Add a quick action
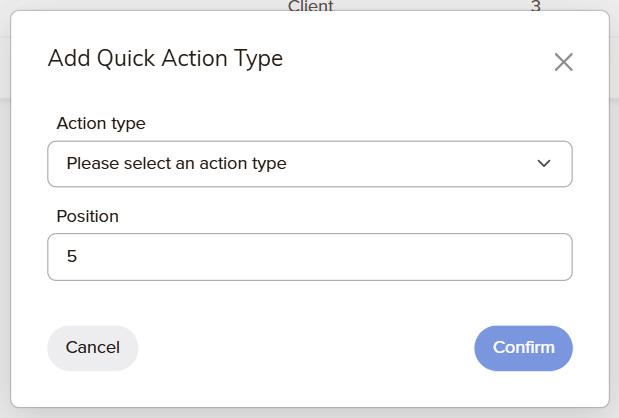
- Click Add.
- Choose the Action type. Each option says whether it is a client or claim action.
Only automated actions run by the LogiClaimX Action Runner are offered, because a quick
action runs the moment it is picked. - Set the Position (it defaults to the end of the list) and click
Confirm.
- Use the position button on a row to reorder it, and the bin to remove it.
- A claim action tied to one claim type only appears for claims of that type.
- A row shown in red (Not shown to agents) was set up before this rule and uses an
action that cannot run on its own. Replace it with an automated action. - Quick actions need the Action Runner service to be running.
Credit Report Lender Names
The Lenders tile (Credit Report Lenders Name Mapping) maps the lender names
that appear on credit reports to your LogiClaim lenders, so claims imported from credit reports
are created against the right lender.
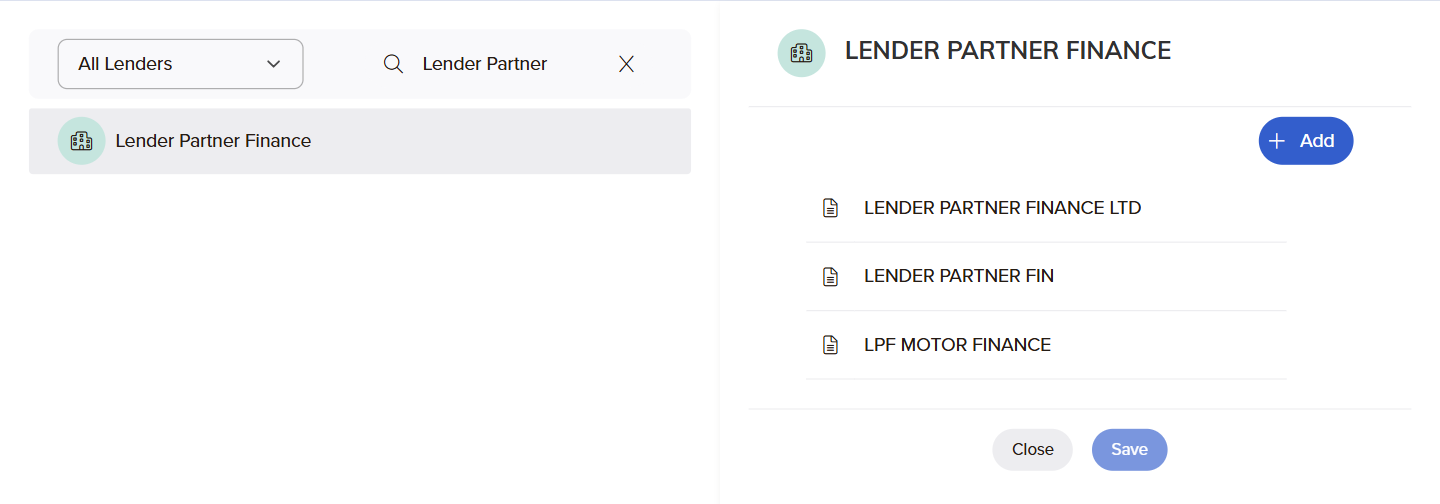
Three credit report spellings mapped to one lender.
Incoming Correspondence does not read this screen directly. It matters because
correspondence is matched against each claim’s lender, so claims imported against the wrong
lender will not match their post. Search for the lender, click Add and
enter each Credit Report Lender Name that should map to it, then
Save.
Other Prerequisites
These settings also shape the Incoming Correspondence screen but are not on the LogiClaimX
Admin Portal. Most are made in the LogiClaim desktop application; the rest are set up by
Logican when the system is installed.
In the LogiClaim desktop application
| Setting | What it does on the correspondence screen |
|---|---|
| Assignment pools – per-user action type rights with Auto assign ticked for the Email and Document action types |
New emails and scanned post are shared out between the pool members; the pools fill the owner filter and the Assign dialog. With no pools, items arrive Unassigned and the filter starts on All users. |
| Action type rights – per user or user template, with Display ticked; the action type must be shown in the schedule list |
Decides which actions each agent can pick in Schedule action…. |
| Favourite buttons – client buttons, and claim type buttons | Fill the star (favourite actions) menu. |
| Document templates – visible templates, by claim type and position | Fill New document from library… and Reply from template…. |
| History filter – Show in client history filter on each action type | Decides which types can be picked in the History tab filter. |
| Questionnaires – claim questionnaires with checkbox and dropdown questions | Needed before categories can set answers. |
| Users’ contact filtering | Agents only see items for the contacts they are allowed to see. |
Set up by Logican
- Inboxes – the system inbox (and any extra mailboxes) and the inbox processor
service that reads them every minute. Office 365 mailboxes need re-authorising when consent
expires. - Correspondence reading – switching parsing on, whether email attachments are read,
long-document splitting, and the OCR service used to read scanned post. - Matching rules – how references, agreement numbers, names, dates of birth and
addresses are recognised, overall and per lender. - Duplicate claim statuses – which claim statuses mark a claim as a duplicate.
- The Action Runner – needed for automatic category handling, quick actions and
Run now. - Document storage – where stored emails and scans are kept.
Scanned post
Scanned post is uploaded through the Agent Portal’s batch upload. Choose the lender at
upload where you can – it makes lender-specific phrases and settings apply. You can leave the
assignee blank; items then go to the scanned-post pool.