How to Add, Change or Delete Status Groups to/from the drop down list
Open the Status Groups List window
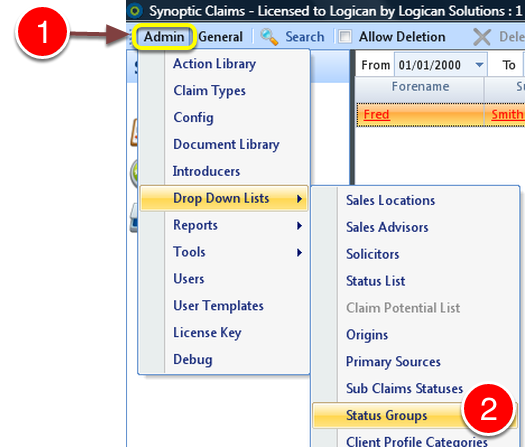
1: Click Admin on the Menu.
2: Select Status Groups from the drop down list – the Status Groups window will open.
Create a New Status Group
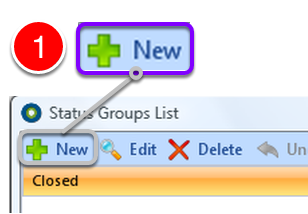
1: Select New from the Menu – the New Status Groups window will open.
Create Group name and attach Statuses
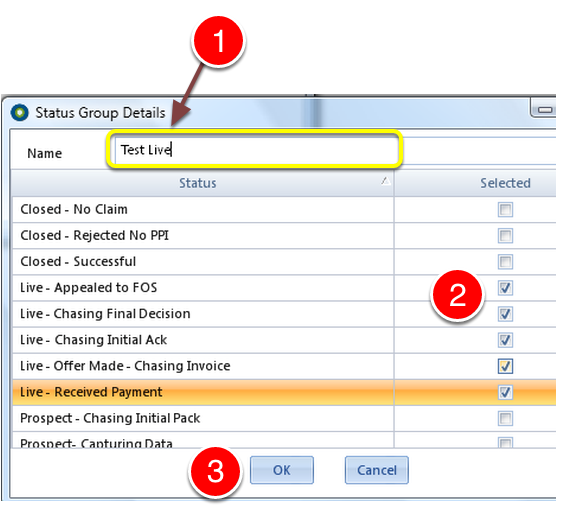
1: Type the name of the Status Group.
2: Select the statuses to add to the croup by clicking the tick boxes.
3: Click OK to save the changes.
Change a Status Group
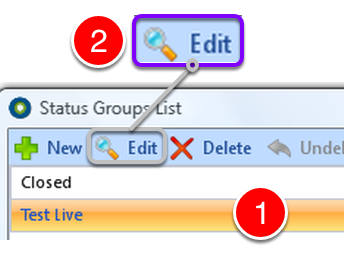
1: Select the Group to change.
2: Click Edit – The Status Group Details window will open.
Change details
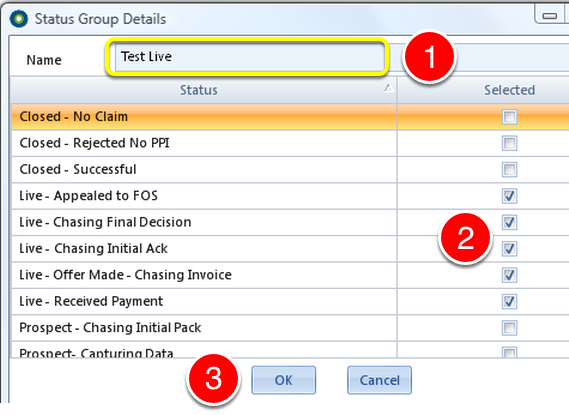
1: If required, change the name by clicking the name and typing the new description.
2: If required, change which statuses are in the group by clicking the check box ticks on or off.
3: Click OK to save the changes and close the window.
Delete a Status Group
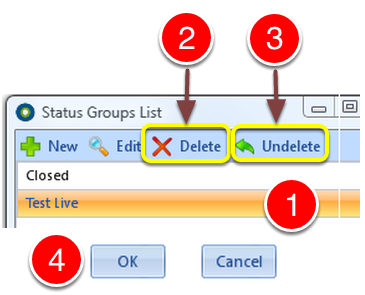
1: Click the Status Group to delete.
2: Click the Delete button – the Status Group will be deleted.
3: If the Status Group was deleted in error, click the Undelete to ABORT the delete.
4: Click OK to save the changes and close the window.