How to set an action to save historical attachments to a folder in JP2 format
Info
Whenever this Action is run, the pre-set attachment type in the claims history will be copied in JP2 format to a pre-determined folder.
Setting the JP2 folder's location
Open the Config
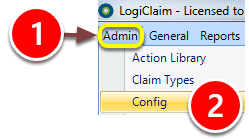
1: Click Admin in the menu.
2: Select Config from the drop-down menu - the Config window will open.
Set the JP2 folder's location
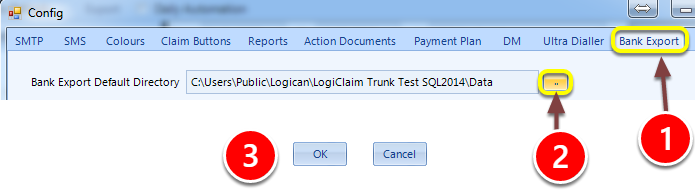
1: Click on the Bank Export tab.
2: Click ... and then navigate to the required folder for the JP2s storage.
3: Click OK to save and close the window.
Set-up the Action
Open the Action Library
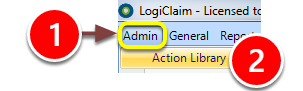
1: Click Admin in the menu.
2: Click Action Library from the drop-down menu.
Open the Action set-up window
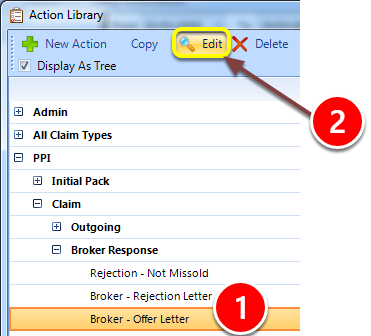
1: Select the required Action to trigger the JP2 copy from the list.
2: Click edit - the Action set-up window will open.
Choose the required attachment to be sent to the JP2 folder
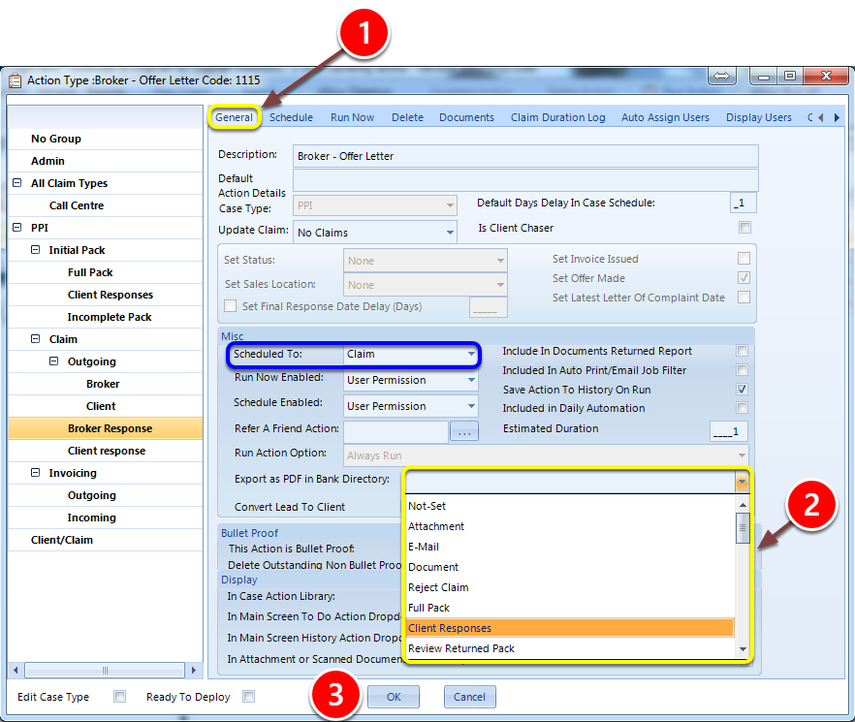
1: Click on the General tab.
2: Select the required attachment type. (This list populate with all actions that are set to appear in the attachment filter.)
3: Click OK to save and close the window.
NOTE this will only function for Claim Actions